
Ordering is done via the MyQ Partner portal.
-
Log in to the MyQ Partner portal using your Partner ID and password.

-
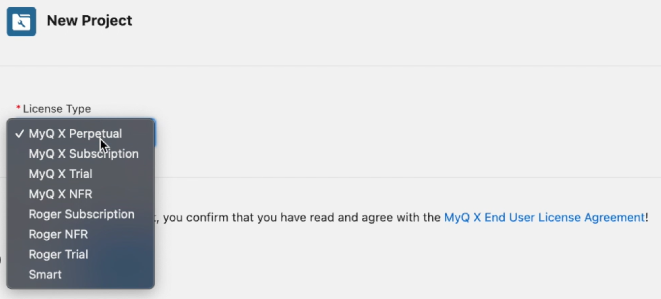
Click on New Project, select the Roger Subscription License Type from the drop-down, and click Next.
-
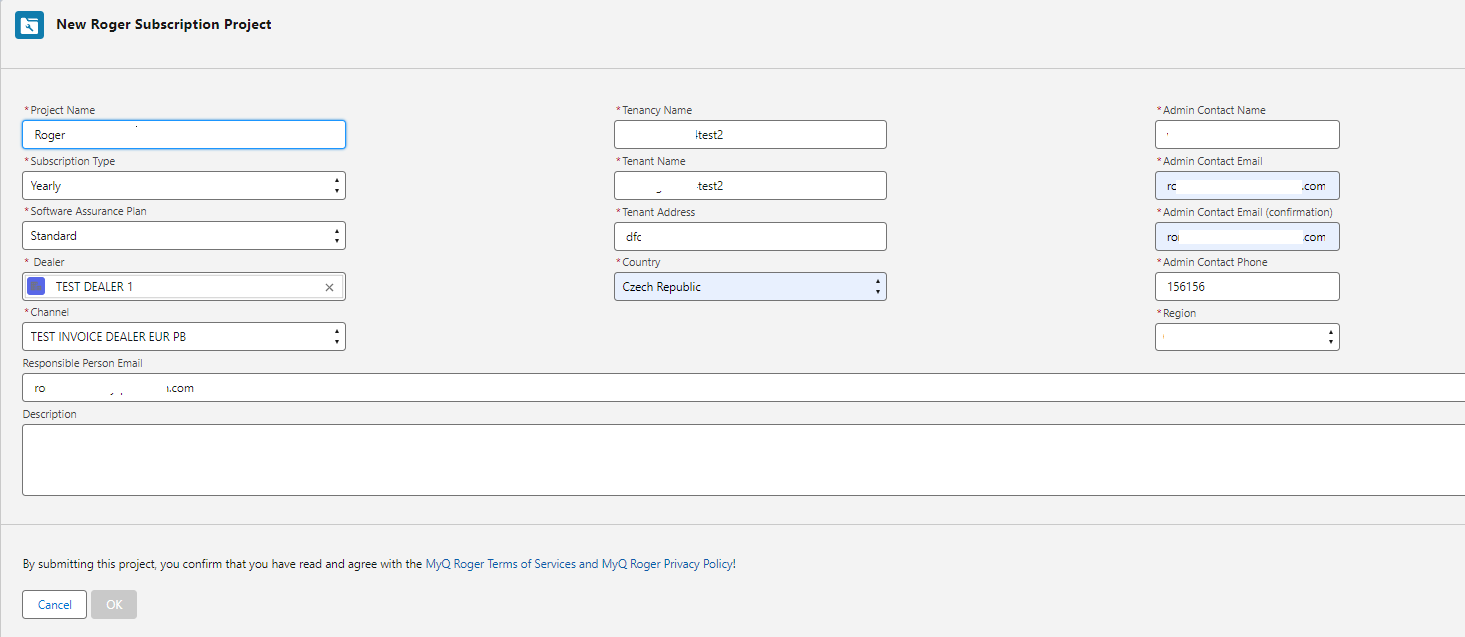
Fill in the following:
-
The Project Name,
-
Select the Subscription Type (Monthly, Yearly, Term),
-
Select the Software Assurance Plan (Standard, Premium, Premium Plus - described in detail here)
-
Select a Dealer and Channel (If the Channel list is empty, please contact your MyQ Account Manager).
-
The customer information (Tenancy info, admin info). You can optionally add a Description as well.
-
-
Click OK.
-
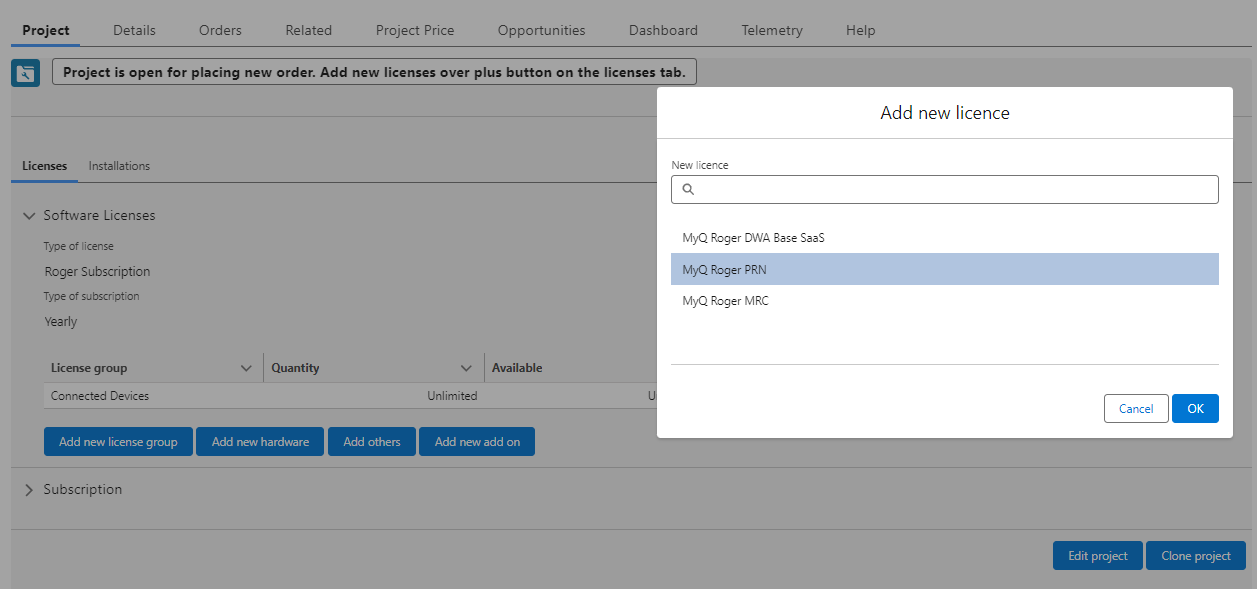
In the Project tab, in the Licenses category, under Software Licenses click Add new license group, select the license type you want to add, and click OK.
-
In the pop-up window, add the number of licenses you want to order and click OK.

-
In the next pop-up window, select the duration of Software Assurance in months and/or years and click OK. Your order is now waiting in the Shopping Cart.
-
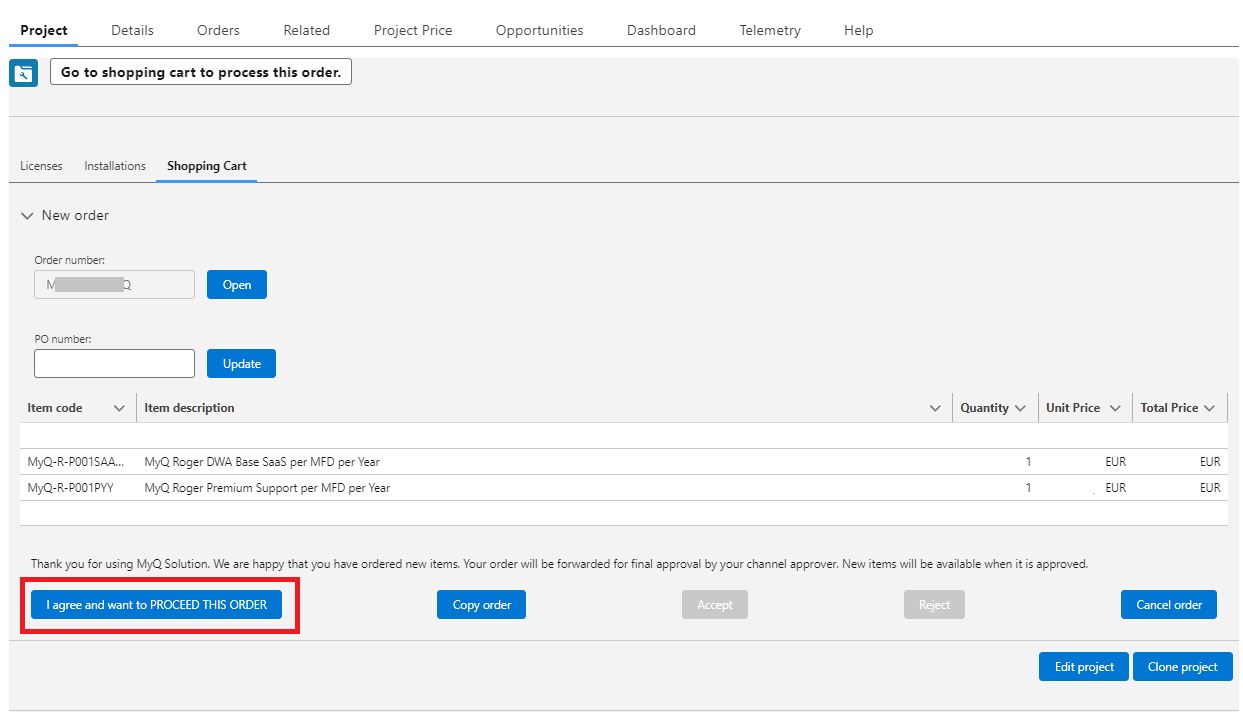
Click on the Shopping Cart category where you can view a summary of your order and finalize it.
-
To finish the order, click on the I agree and want to PROCEED THIS ORDER button. Confirm the order in the pop-up window by clicking OK.
-
Before finalizing the order, you can copy the order’s details in your clipboard by clicking Copy order, or you can cancel it by clicking Cancel order.
After you click the I agree and want to PROCEED THIS ORDER button, the order is sent to the responsible approver, and you also receive an email with information about who your order's approver is.
Once the order is finalized, it is not possible to add a new order to the project until the first one is approved.
-
You can view your project’s details in the Details tab, and your orders list and status in the Orders tab.
If you click on an Order ID, you can view the order’s details (specific items, their quantity, unit, and total price, etc.). -
If you want to edit your project’s details (project name, admin contact, description, etc.) you can click the Edit project button located at the bottom-right side in any tab and make the changes.
Add Licenses to an Existing Project
To add licenses to an existing project:
-
Log in to the MyQ Partner portal using your Partner ID and password.
-
Click on Projects List and Search for the Project you wish to add licenses to.
-
Click on the Project Name to expand the Project details.
-
Click on the plus (+) icon next to the edition you want to expand on.
(If you want to also add another license group. -
Click the Add license group button and select the license from the drop-down.)
-
In the pop-up window, add the number of licenses you want to order, and click OK.
The new licenses are added to the shopping cart, along with the software assurance license which is calculated until the end of support date. -
Click on the Shopping Cart tab to review and finish the order.
-
Click I agree and want to PROCEED THIS ORDER.
Your order is sent to the responsible approver.
Order Add-ons
To order the MyQ Roger CPM Module add-on, you first have to have a mandatory MyQ Roger DWA Base SaaS license ordered and paid. After that is done:
-
Log in to the MyQ Partner portal using your Partner ID and password.
-
Click on Projects List and Search for the project with the paid MyQ Roger DWA Base SaaS license.
-
Click on the Project Name to expand the Project details.
-
Click on the Add new add-on button.
-
In the pop-up window, select the MyQ-R-CPM add-on and click OK.
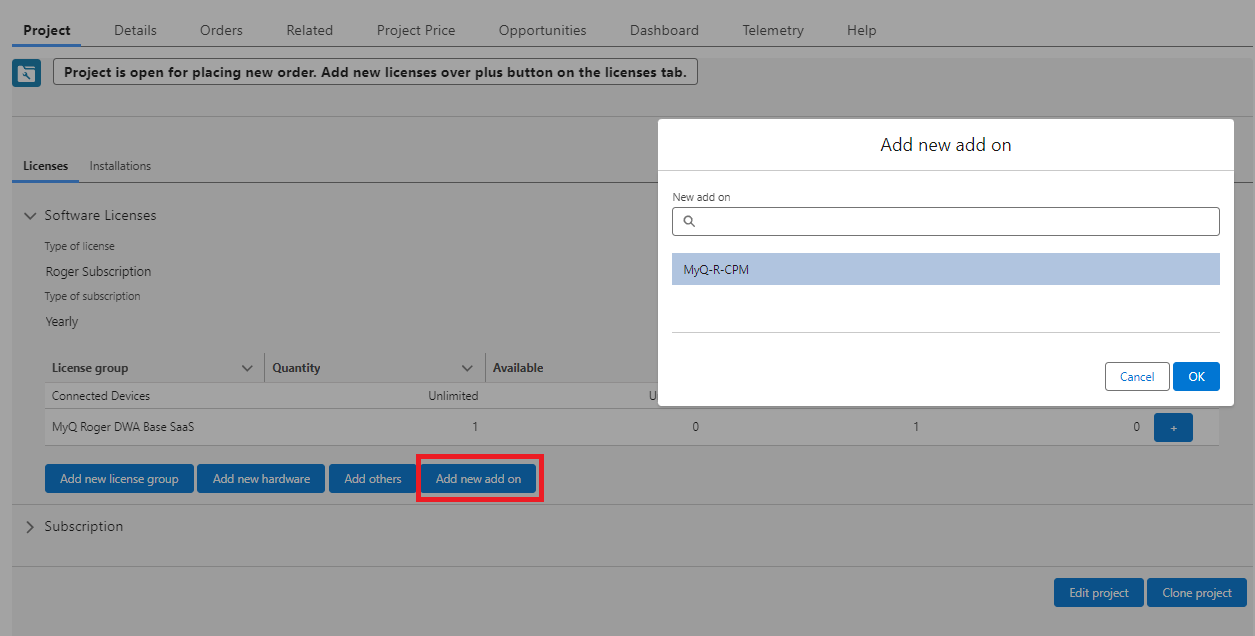
The add-on licenses are added to the shopping cart.
-
Click on the Shopping Cart tab to review and finish the order.
-
Click I agree and want to PROCEED THIS ORDER. Your order is sent to the responsible approver.
Subscription Information
To view your subscription expiration date, go to Licenses > Subscription.
All plans can be renewed/extended up to 10 days after expiration.
|
Topic |
Monthly subscription |
Annual subscription |
Term subscription |
|---|---|---|---|
|
Billing & renewal |
Automatically renewed and charged on the 1st day of the upcoming month |
Charged annually |
Expiration date is set during creation; the full term is paid upfront |
|
Add licenses |
Licenses can be added at any time; charges apply on the 1st of the upcoming month |
Licenses can be added at any time; charged in bulk for remaining months |
Not applicable |
|
Change subscription type |
Can be changed from monthly to annual in the Licenses tab |
Can be changed from annual to monthly in the last month of the subscription |
Not applicable |
|
Cancellation |
Can be canceled before expiration |
Can be canceled in the last month before expiration |
Can be canceled before expiration |
|
Discounts |
Not applicable |
Not applicable |
Discount applies when purchasing 12 months or more |
Software Assurance
You can upgrade your Standard Software Assurance plan to the Premium one, and the Premium one, to the Premium Plus plan. Downgrading is not possible.
To change (upgrade) your Software Assurance plan:
-
Log in to the MyQ Partner portal using your Partner ID and password.
-
Click on List of Projects and select the Project you wish to update.
-
In the Licenses category, under Software Assurance, click on the Change Software Assurance Plan button, select the new Software Assurance plan from the drop-down, and click OK.
-
Once you click OK, your order is confirmed and waiting for approval.