MyQ Roger Mobile App
The MyQ Roger mobile application can be used both on iOS and Android devices, including Chromebook devices, and it is available for free download in the App Store and in Google Play.
In Android devices, open the Google Play Store application, search for MyQ Roger > Cloud Print & Scan,
Select MyQ Roger > Cloud Print & Scan, and tap Install.
In iOS devices, open the App Store application, click on Search on the bottom-right and search for MyQ Roger > Cloud Print & Scan, select MyQ Roger > Cloud Print & Scan, and tap Get.
For a detailed MyQ Roger mobile app overview, check the MyQ Roger Mobile App Installation and Usage guide, and the brand-specific MyQ Roger guides.
User Authentication
In the MyQ Roger mobile app,
Go through the mini welcome guide.
Choose in which Region to save your data (European data center or American data center).
Type the name of your tenant in the Tenancy name field.
Choose the account you want to use to log in.
By choosing WORK ACCOUNT, you can log in to the MyQ Roger tenant, with multiple sign-in options:
Sign in with MyQ - Type your MyQ Roger credentials and tap SIGN IN.
Username / E-mail address - Your MyQ Roger Username or email address.
Password - Your MyQ Roger password.
Sign in with Apple - You are redirected to log in to your Apple account.
Sign in with Google - You are redirected to log in to your Google account.
Sign in with Microsoft - You are redirected to log in to your Microsoft account.
By choosing PERSONAL ACCOUNT, you can use a personal MyQ, Apple, Google or Microsoft account to use the MyQ Roger mobile app.
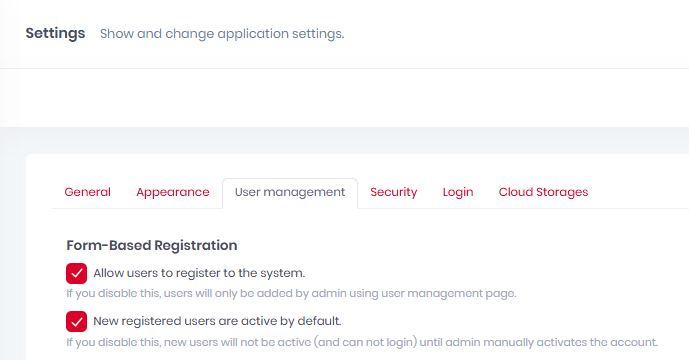
For users to be able to use a personal account, external providers, or sign up, the administrator should enable the Allow users to register to the system setting, available in the MyQ Roger web server, in Administration > Settings > User management.
If the New registered users are active by default setting is disabled, any newly registered user account will not be active until the administrator manually activates their account.

If a user registers an account directly by using external authentication (Apple, Google, Microsoft):
The registration process generates a user name and the user can change it later.
If the Name or Surname is not provided or generated by the external provider, the user account will be created as Guest_{randomchars}.
Once registered, the account needs to be activated by the Administrator (if automatic activation is disabled).
External authentication is not currently available for users with an existing account.
