When you download a Desktop Client from the Desktop Clients page, you can create customized installer configurations. This allows you to pre-configure settings so that users don't need to enter them manually during installation.
For each platform, you can create up to 10 customized installers.
Create a Configured Installer
-
Go to Supervision > Desktop Clients.
-
Click Download and select MyQ Roger Client for Windows or MyQ Roger Client for macOS.
-
In the dialog that opens, select the version from the dropdown.
-
Click Hide/Show next to Configuration to expand the configuration options.
-
Configure the settings as needed (see below).
-
Click Create.
The configured installer appears in the list at the bottom of the dialog.

Configuration Options
Tenant & Region
These values ensure that the configured installer connects to the correct tenant. The values are required, and are generated automatically by the configuration builder based on your tenant.
-
TENANCYNAME
-
REGIONID
If you create or edit a configuration manually, you must include these values. Otherwise, the configured installer will fail to connect to your tenant.
User Authentication & Display
-
Tenant Name (Display Name)
The display name shown to users in the client. (Windows only) -
User Single Sign On
Enable SSO authentication with Microsoft Entra ID. (Windows only)
Printer & Spooling Settings
-
Printer Spooler
Select the spooling mode: Client Spooling, Cloud Spooling, or both. -
Printer Name
The name of the printer created during installation. Default is MyQ-Roger-MRC (Windows) or MRC-Printer (macOS). -
Failover Enabled
Enable fallback printing when the server is unavailable. Default is TRUE (Windows) or 1 (macOS).
Driver & Default Print Modes
-
Default Driver
Select a bundled universal driver (Kyocera, HP, or RICOH) or specify a custom driver name.
The custom driver must already be installed on the target computer. Enter the exact name (case-sensitive) of the custom driver. -
Color Print Options
Set the color configuration mode of the printer:-
1 - Only color
-
2 - Only B&W
-
3 - Both
-
-
Default Duplex Mode
Set the default duplex setting. (Windows only)-
One-Sided
-
Two-Sided Long Edge
-
Two-Sided Short Edge
-
Local Print Monitoring (LPM)
-
LPM Enabled
Enable monitoring of print jobs sent to local printers, bypassing the Roger server. Default is FALSE (Windows) or 0 (macOS). -
LPM Ports
A list of printer port (Windows) or printer names (macOS) to be monitored when LPM is enabled. Use a comma- or semicolon-separated list of values (case sensitive).
Configuration String
As you configure options, the configuration string at the bottom of the dialog updates automatically. This string shows the parameters that will be applied to the installer.
Example:
TENANCYNAME=[TENANT-NAME],REGIONID=US,PRINTERNAME="MyQ-Roger-MRC",DEFAULTDRIVER=1,PRINTERSPOOLER=1
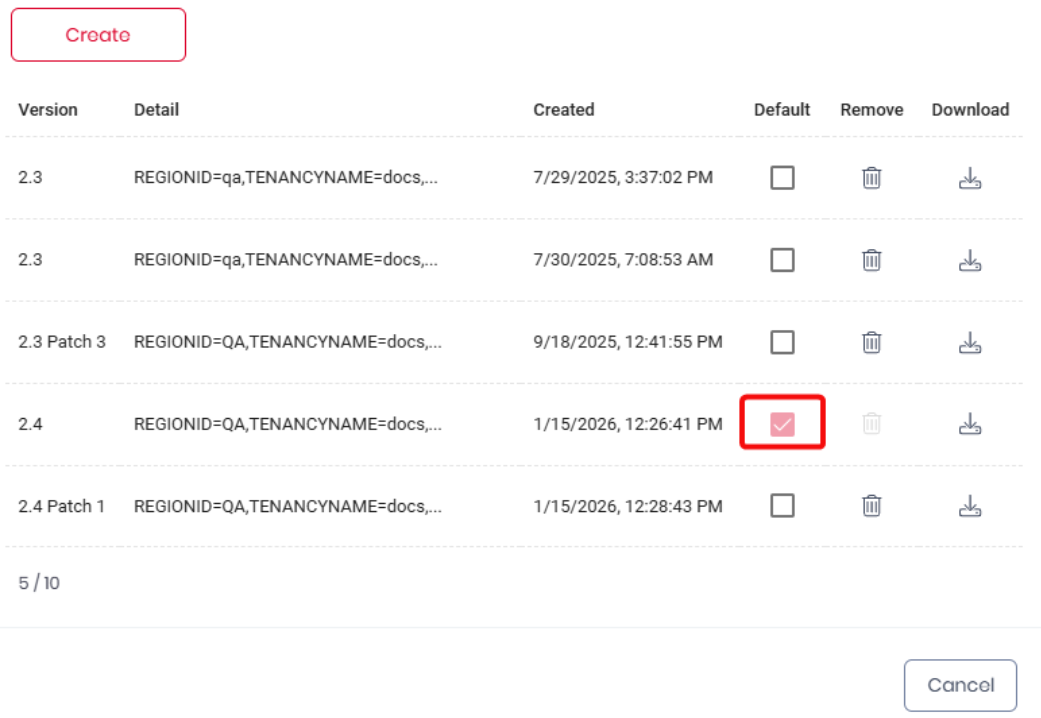
Manage Configured Installers
The list at the bottom of the dialog shows all configured installers you have created, including their version, configuration string, and creation date. You can set a default installer, download and remove a configured installer.
To copy and customize an installer configuration, hover over the Detail value and click copy. Then paste the text into the configuration field, and customize it as required and click Create.
Set a Default Installer
You can set one default installer each for Windows and macOS.
Select the Default checkbox next to an installer to make it the default. The default installer is:
-
Sent to users in welcome emails (if enabled)
-
Available for download from the My Settings page
-
Used for remote client updates