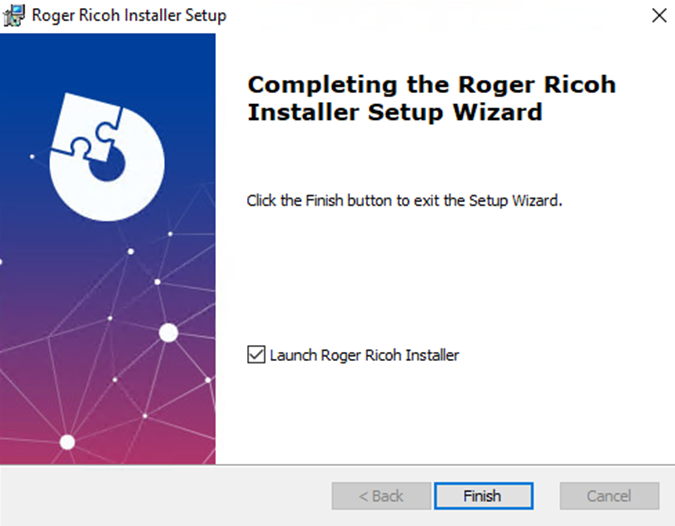
Automatic Launching of Roger Ricoh Installer
Once MyQ Roger Ricoh Installer is installed,
-
You can select to Launch Roger Ricoh Installer automatically before you click Finish on the Setup Wizard.
-
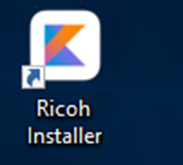
You can also double-click on the Richo Installer desktop shortcut.
-
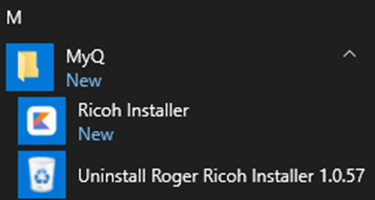
You can access the Richo Installer option from the Windows Start Menu.
-
You can go to the
C:\Program Files\MyQ\Roger Ricoh Installerfolder (if the folder wasn’t changed during the installation) and run the Ricoh Installer application as an Administrator.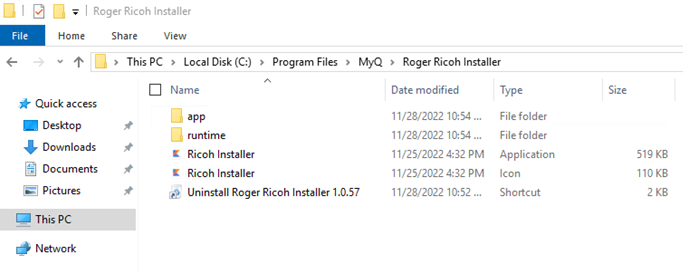
Adding the Installation Package to the Installer
The installer is installed without a package. The installation package must be manually added in order to install the terminal. Information about the current installation package version is displayed at the bottom left corner.

To add the installation package to the installer, it should be possible to use drag-and-drop and move the installation package to the installer. If the installation package is correctly used, its version is displayed at the bottom left corner.
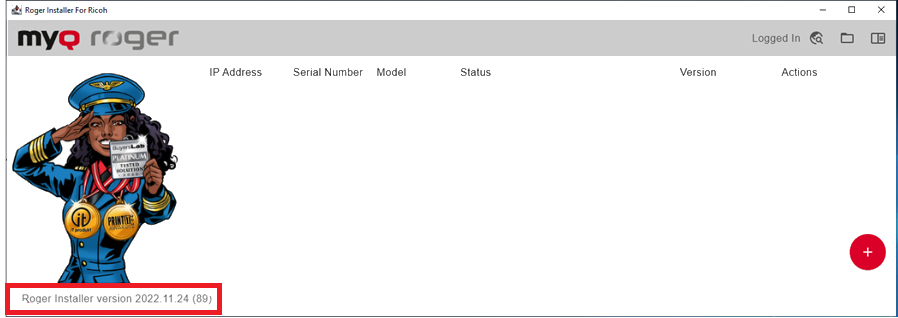
The next time you use the installer, there is no installation package, and you must drag-and-drop it to the installer again.
In some cases, drag-and-drop cannot be used. A second way to add the package is to open the folder C:\Program Files\MyQ\Roger Ricoh Installer\app\resources and place the installation package there. The installer has to be opened after adding the package to the folder. If this method is used, the installer is opened with the package in the next run of the installer.
If a different version of the installation package than the one in the installer is used, it is possible to use the steps for adding the installation package to the empty installer.
If you want to use a different version of the installation package than the one in the installer, you can either drag and drop it to the installer or place it in the above-mentioned folder.
If the package is replaced by drag-and-drop, the change is used only for the current run of the installer. The previously used version of the installation package is used in the next run of the installer.
If the package is replaced by adding the installation package to the folder, the previous version of the installation package must be deleted from the folder.
Log in
In the app,
-
Click on the login arrow button in the upper-right corner to log in to your tenant.
-
Fill in the Select Region, Tenant, Username, and Password fields and click Confirm.
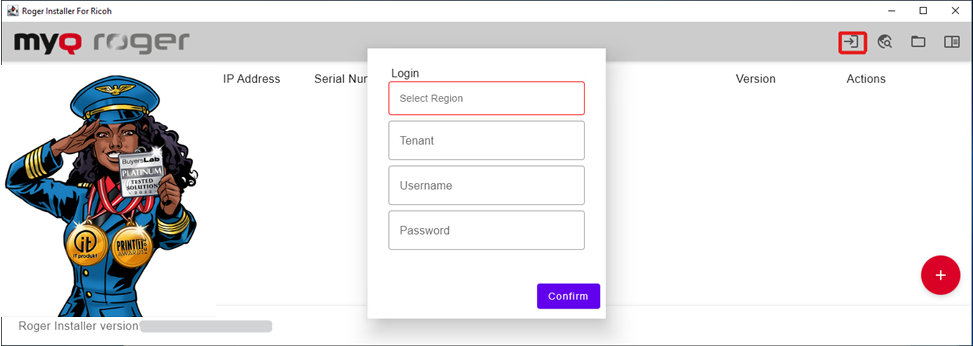
When logging in, if a user has rights to manage printers and then performs an installation, the installed terminal will be automatically registered to the tenant.
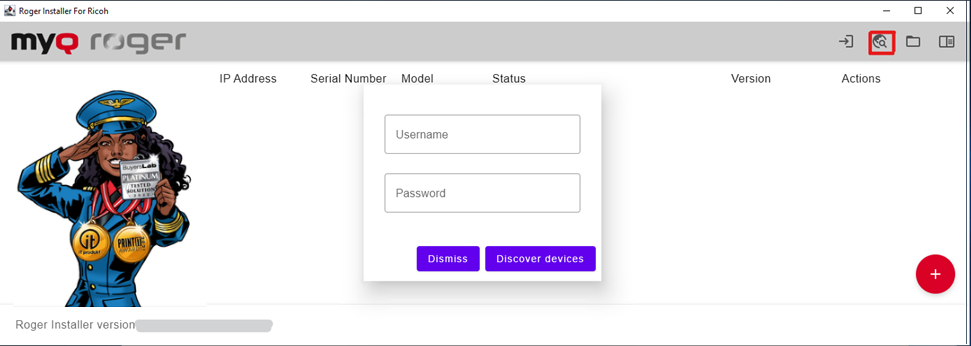
Printer Discovery
You can discover available printers using either of these two methods:
-
Click on the globe icon in the upper-right corner.
-
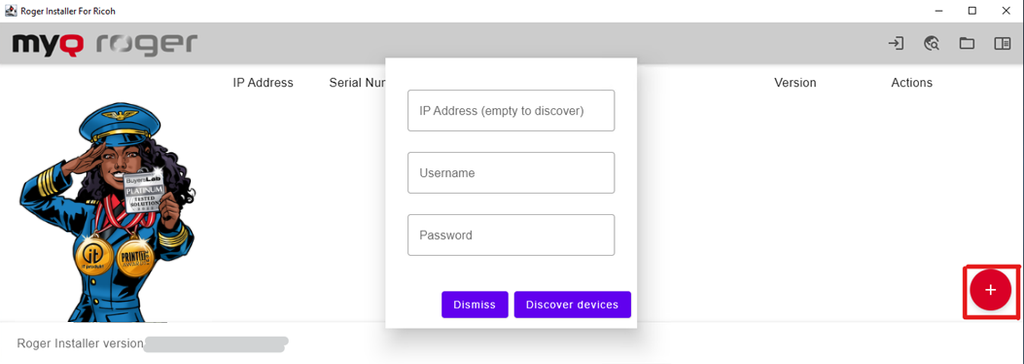
Optionally add the printer’s administrator credentials (Username, Password). Click Discover devices.
-
Click on the red plus sign button in the lower-right corner.
-
Add a printer’s IP Address to discover a specific device.
If left empty, all the available devices will be discovered. -
Optionally add the printer’s administrator credentials (Username, Password). Click Discover devices.
-
After clicking Discover devices, the printer discovery progress displays. To stop it, click Stop Discovery in the lower-left corner.
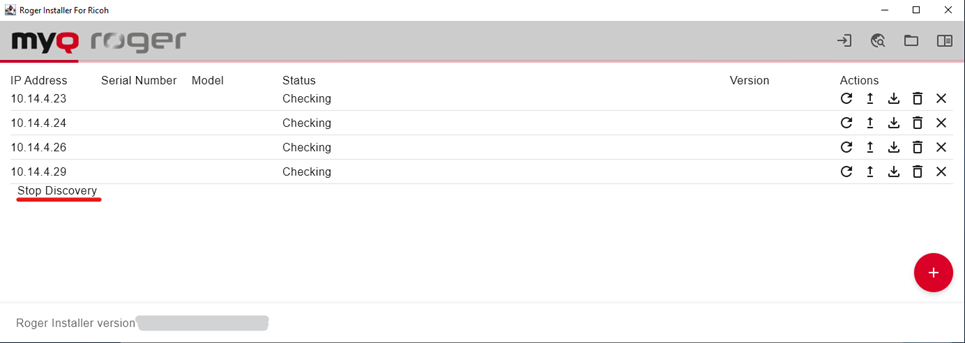
Once the printer discovery is finished, you can view all the available devices information: their IP Address, Serial Number, Model, Status, Version (if MyQ Roger is already installed on the device), and available Actions.
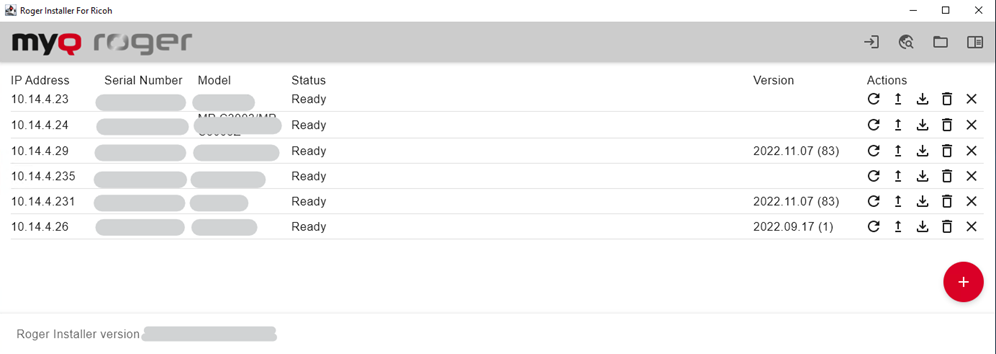
If you haven’t added the printer’s administrator credentials before the discovery, the printer’s Status is Password required for setup.
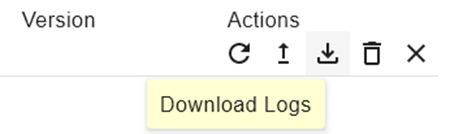
Available Actions
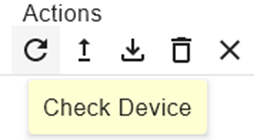
There are five available actions for each discovered device:
-
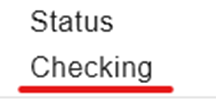
Check Device - Click to manually refresh the device’s status in the app.
It is possible to cancel this by clicking on Checking under Status.
-
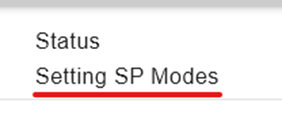
Full Install Roger - Click to install MyQ Roger on the device.
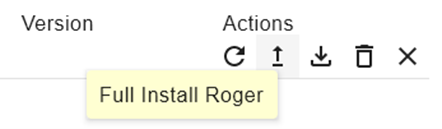
It is possible to cancel the installation by clicking Setting SP Modes under Status.
-
Download Logs - Click to download the device logs.
-
Remove Roger - Click to remove MyQ Roger from the device.
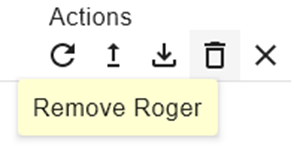
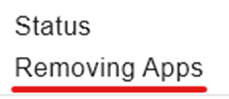
It is possible to cancel the removal by clicking Removing Apps under Status.
-
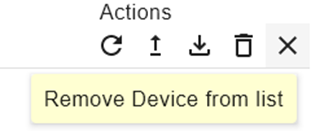
Remove Device from List - Click to remove the device from the list of devices in Roger Installer for Ricoh.
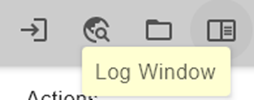
Other Available Actions
Other available actions in the app include:
-
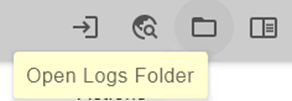
Open Logs Folder - Click on the folder icon in the upper-right corner to open the logs folder.
-
Log Window - Click on the Log Window to display the live log of the installer.