
This section describes how to connect a Stripe account to MyQ Roger as your payment gateway. PrintSharing uses Stripe Connect to process guest payments. This setup allows guest payments to flow directly to your Stripe account, giving you full control over your revenue while automatically handling the MyQ platform fee. As the merchant of record, you manage customer receipts, refunds, and payment disputes directly through your Stripe account.
Stripe onboarding is necessary if you will use Paid Printing mode. You do not need Stripe Connect to use Complimentary Printing mode.
Roger supports two ways to connect Stripe:
-
Stripe Onboarding: Roger creates a new Stripe Express account on your behalf. Choose this if you don't already have a Stripe account.
-
Existing Stripe Account: Connect your existing Stripe Standard account to Roger via OAuth. Choose this if you already have a Stripe account you want to link to Roger.
Before You Begin
First, verify that your country is supported by Stripe. Then, depending on your chosen connection method, you will need:
For Stripe Onboarding:
-
Business information (legal name, address, tax ID)
-
Banking details for receiving payouts
-
Contact information for your business
-
Approximately 15-30 minutes to complete the process
To Connect an Existing Account:
-
An existing Stripe Standard account with your business already configured
-
Access to log in to that Stripe account during the authorization step
Each Stripe account includes a sandbox environment that you can use to validate your integration before you start working with real transactions.
For more information, see the Stripe documentation:
-
https://stripe.com/en-cz/global
(Extended Network locations are not supported).
Option 1: Stripe Onboarding
Use this option if you do not already have a Stripe account.
-
Go to Roger > PrintSharing > Configuration, and select the Stripe Connect & Receipt tab.
-
Click Open Stripe Onboarding. You are redirected to Stripe's secure onboarding platform.
-
Proceed through the form and provide your business information. This varies depending on your location, but typically includes:
-
Business details: Legal business name, type (individual, company, non-profit), and industry
-
Contact information: Phone number and email address for account notifications
-
Business address: Physical location where your business operates
-
Tax information: Tax ID
-
Banking information: IBAN for the account where you want to receive payouts from guest payments
-
Account Verification Process
When you finish filling out all required fields in Stripe's onboarding form and submit, you are redirected back to Roger. You will see a success message: "Stripe Connect onboarding completed."
Important: This does NOT mean your account is immediately active.
After you complete the form:
-
Stripe reviews your information: Stripe verifies your business details, which may take several hours to several days.
-
Roger checks account status: Roger server continuously queries Stripe to check if your account is fully verified and active.
-
Automatic activation: Once Stripe approves your account, Roger automatically switches payments to flow directly to your Stripe account.
During the verification period (PENDING state):
-
Your PrintSharing service remains operational
-
You can still test and use PrintSharing normally
Once verification completes (CONNECTED state):
-
Payments automatically flow directly to your Stripe account
-
You see the full revenue (minus MyQ platform fee and Stripe processing fees)
-
You manage payouts, refunds, and disputes through your own Stripe dashboard
Option 2: Connect an Existing Stripe Account
Use this option if you already have a Stripe Standard account that you want to connect to Roger.
-
Go to Roger > PrintSharing > Configuration, and select the Stripe Connect & Receipt tab.
-
Select Connect Existing Account. You are redirected to Stripe's authorization screen.
-
Log in to your existing Stripe account and approve the connection request.
-
Stripe redirects you back to Roger. Roger automatically exchanges the authorization and links your account.
-
You will see a confirmation that your Stripe account is connected.
Your existing Stripe account is now connected and operational within Roger. Because your account is already configured in Stripe, no additional verification period is required.
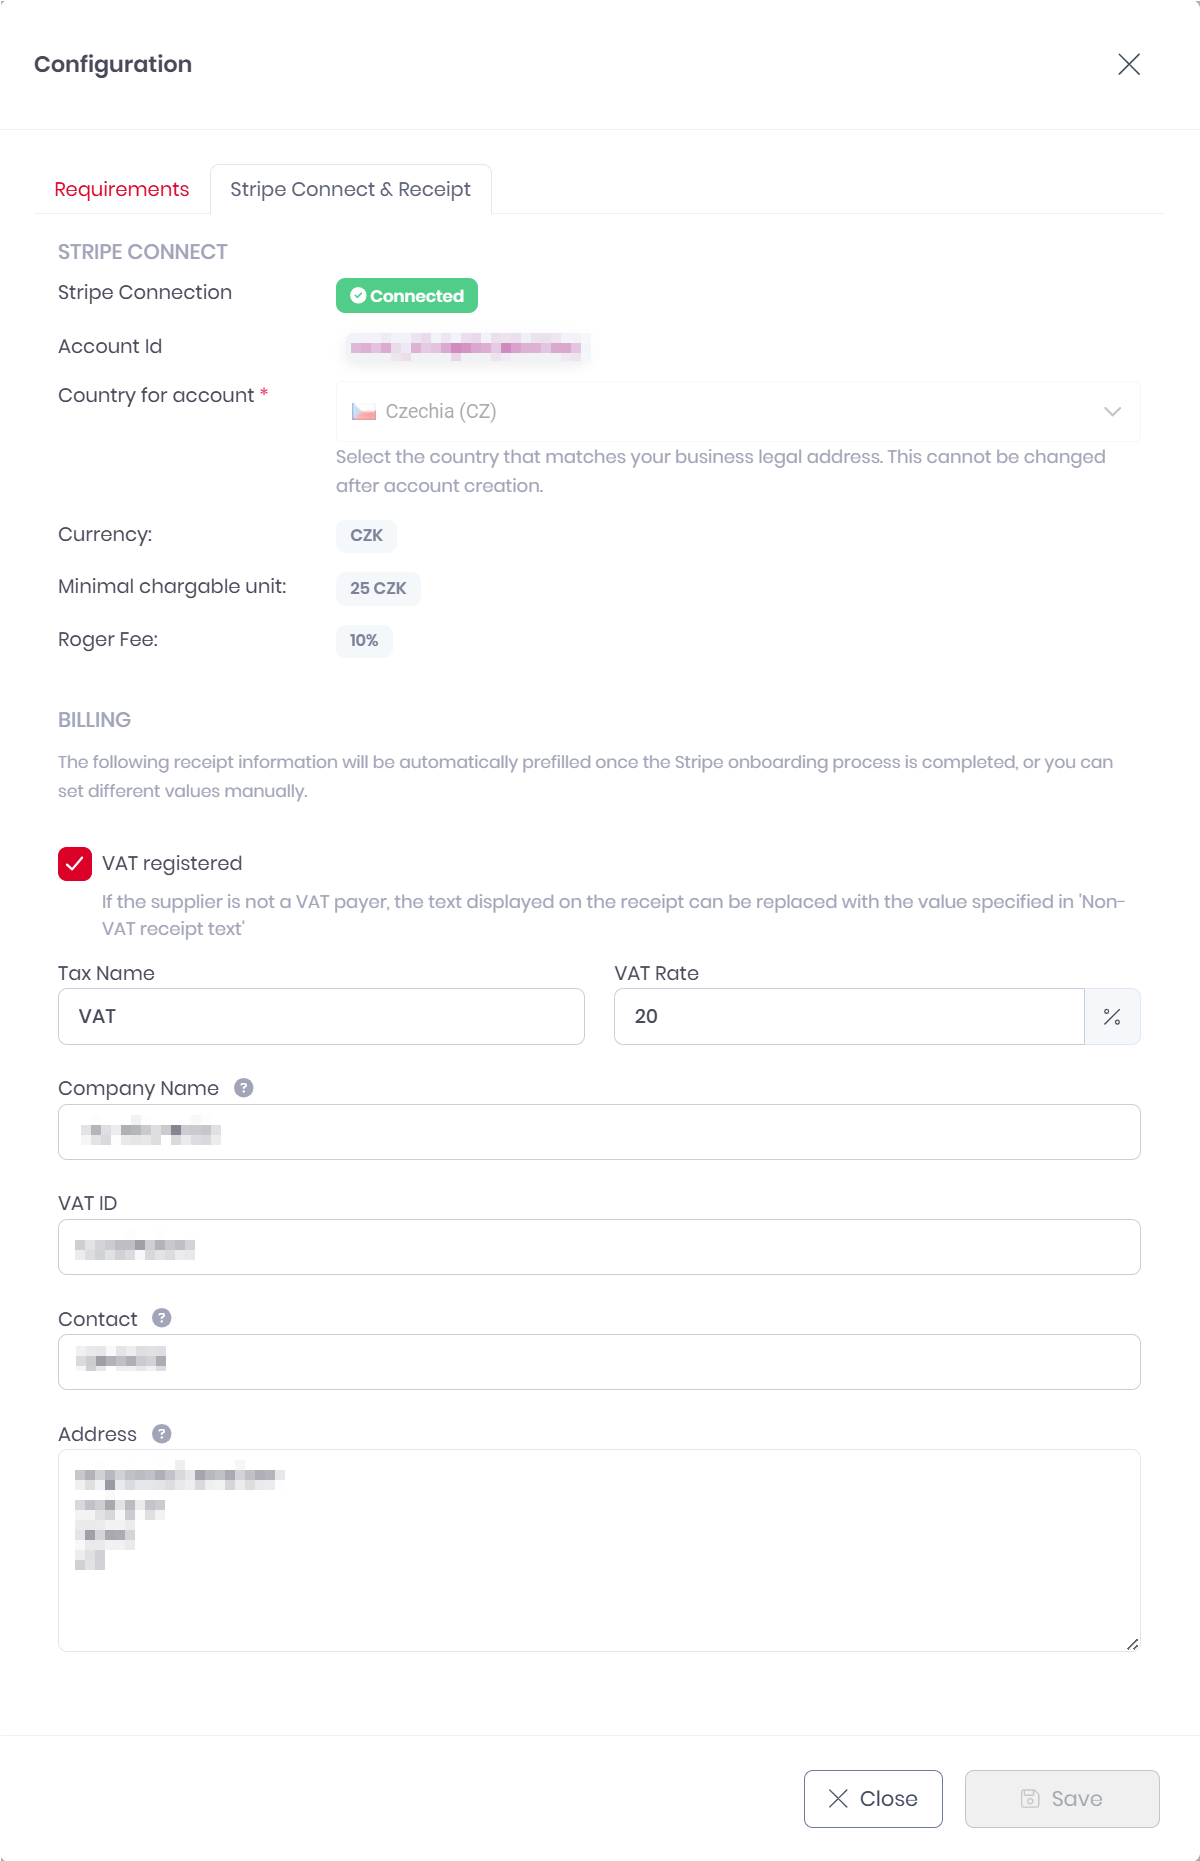
Review Billing Details
After connecting or onboarding a Stripe account, review your billing details. These appear on all guest receipts.
Roger automatically imports business information from your Stripe account, but you can edit any field to customize how your business appears to guests. For example, use a customer-facing name ("Downtown Hotel") instead of your legal entity name, or specify a location-specific address.
To review and edit billing details:
-
Go to Roger > PrintSharing > Configuration.
-
Select the Stripe Connect & Receipt tab.
-
Under BILLING, review and update the following fields:
-
VAT registered: Select if your organization is a registered VAT payer.
-
Tax Name: Type a label for your tax. For example, “Sales Tax” or “VAT”.
-
%TaxName% Rate: Enter your applicable tax rate as a percentage.
-
Company Name: Your business name as it should appear on receipts.
-
VAT ID (EU businesses only): Enter your VAT identification number for tax reporting.
-
Contact: Provide an email, phone number, or website for customer inquiries.
-
Address: Your business address (imported from Stripe, editable).
-
-
Click Save
Review Minimum Chargeable Amount
When processing payments, each currency has a minimum amount that can be charged to customers. These thresholds exist because transaction processing costs make very small payments impractical, and some currencies have denominations that do not support fractional amounts.
The table below shows the most common 21 currencies. For a list of the minimum chargeable amounts for all supported currencies, see Minimum Chargeable Amounts.
|
Currency Code |
Currency Name |
Minimum Chargeable Amount |
|---|---|---|
|
AUD |
Australian Dollar |
2 AUD |
|
BRL |
Brazilian Real |
6 BRL |
|
CAD |
Canadian Dollar |
2 CAD |
|
CHF |
Swiss Franc |
1 CHF |
|
CNY |
Chinese Yuan |
10 CNY |
|
CZK |
Czech Koruna |
25 CZK |
|
DKK |
Danish Krone |
8 DKK |
|
EUR |
Euro |
1 EUR |
|
GBP |
British Pound Sterling |
1 GBP |
|
HKD |
Hong Kong Dollar |
8 HKD |
|
INR |
Indian Rupee |
100 INR |
|
JPY |
Japanese Yen |
150 JPY |
|
KRW |
South Korean Won |
1500 KRW |
|
MXN |
Mexican Peso |
20 MXN |
|
NOK |
Norwegian Krone |
10 NOK |
|
NZD |
New Zealand Dollar |
2 NZD |
|
SEK |
Swedish Krona |
11 SEK |
|
SGD |
Singapore Dollar |
2 SGD |
|
TWD |
New Taiwan Dollar |
40 TWD |
|
USD |
United States Dollar |
1 USD |
|
ZAR |
South African Rand |
20 ZAR |