
Printing Related Settings
Printing via MyQ Roger is possible using these methods:
Printing from Cloud – The Cloud storage has to be connected to the account. It is only possible to print pdf and jpg files from Cloud storage. The Size parameter can be used in the Mobile app only for pdf files.
Printing from the mobile application – For printing from the mobile application at least one Cloud storage has to be connected to the account for storing the jobs. The Size parameter can be used in the Mobile app only for pdf files.
Printing via MyQ Roger Client – No special settings needed on the terminal side. For the MyQ Roger Client configuration, check the MyQ Roger Client for Win manual.
Printing via Universal Print – No special settings needed on the terminal side. For the Universal Print configuration, check the MyQ Roger Server Administration manual, chapter 3.4 Universal Print. It is not possible to set paper size for Universal Print jobs. The Cassette 1 paper size is used for Universal Print jobs.
Printing via Device Spool – All jobs are securely stored on the device’s hard drive, allowing printing to continue even when the PC is offline. This method ensures that once a document is sent, it stays on the device’s internal storage, enabling on-demand printing without needing a constant connection to the computer.
Windows Settings
Adding Printer using Standard Windows Dialogs
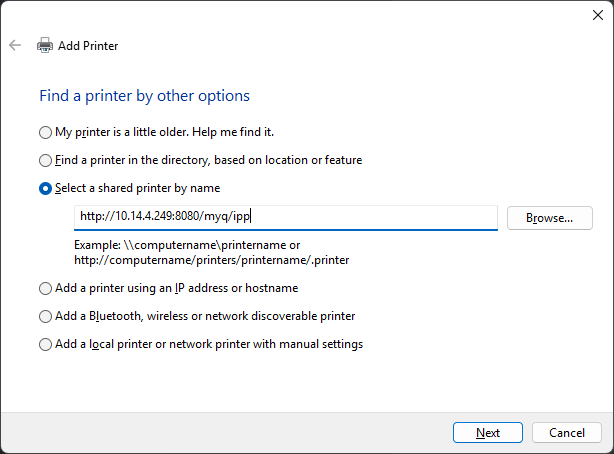
Add a new device manually.
Select a shared printer by name - http://<printer.ip|hosname>:8080/myq/ipp (e.g. http://10.14.4.249:8080/myq/ipp).
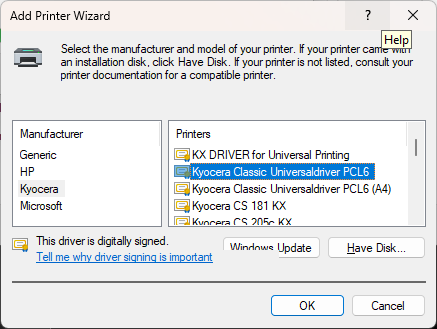
Select Kyocera Classic Universaldriver PCL6.
IPPS
SSL - Windows needs trusted certificate for SSL to work.
This can be resolved by adding device certificate into Third Party Root certificates in windows certificate store and then adding a printer using its hostname.
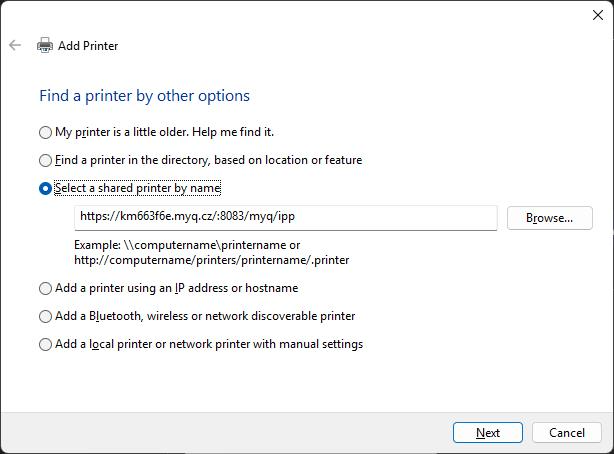
The port for SSL is 8083 so the service is at e.g. https://km663f6e.myq.cz:8083/myq/ipp.
MacOS Settings
Navigate to the CUPS web UI: http://localhost:631
If disabled, you need to enable it by entering “cupsctl WebInterface=yes” to the terminal on your Mac.

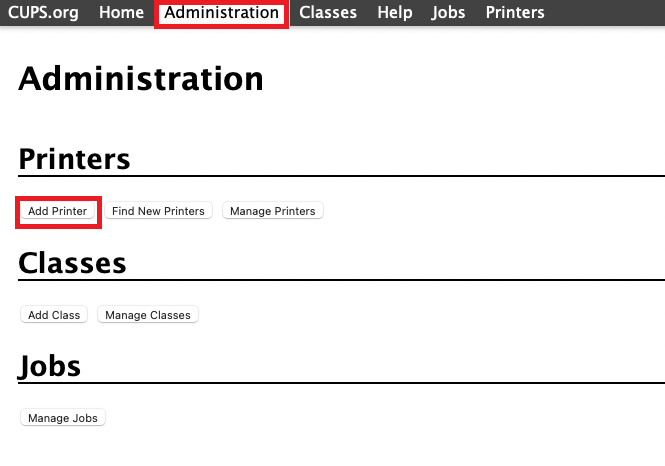
On the CUPS web UI, go to Administration in the top bar, and click Add Printer.
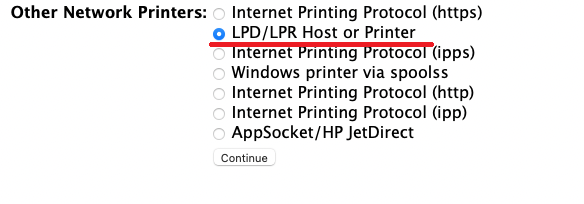
On this page, ignore any discovered printers, select the LPD/LPR Host or Printer option, and click Continue.
In Connection, type: socket://[hostnameOrIP]:10012
Where [hostnameOrIP]:port sets the hostname or IP address of the printing device in your network and the port you want to use, e.g.socket://10.14.4.25:10012.Click Continue (** Check the full list of communication protocols and ports below).
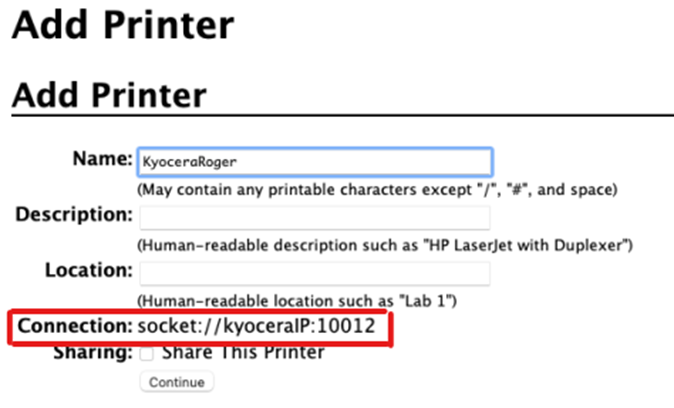
In the next page, fill in the Name and Location information, and click Continue.
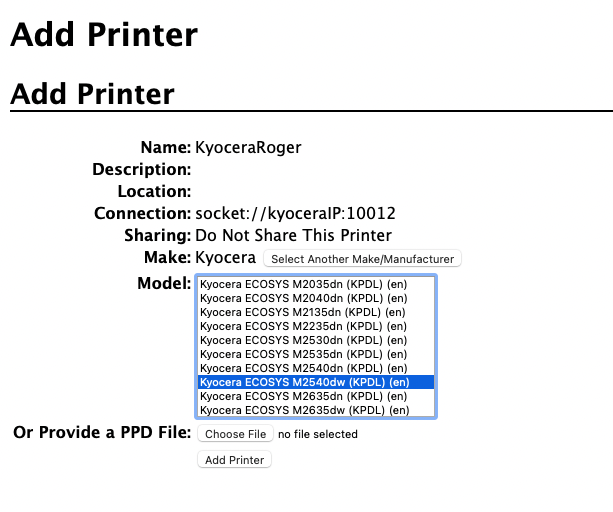
Select the Kyocera Driver for the given model and click Continue.
On the next page, fill in the default options for the given model, and click Set default options.
The printer is now available in your printers list as a standard printer.