
Configuration of the Device
Configure SMTP and Scanning Options
This setting is required for using scan to @me, scan to @email, and Panel Scan operations:
-
Open the web UI of the device and login as Administrator.
-
Go to Device Management > Configuration > Device Settings: Email
-
Configure SMTP Server Name, SMTP Port No. and SMTP authentication.

Automatic User Logout Timer
To set up a timer for automatic user logout:
-
Log in to the device's web UI.
-
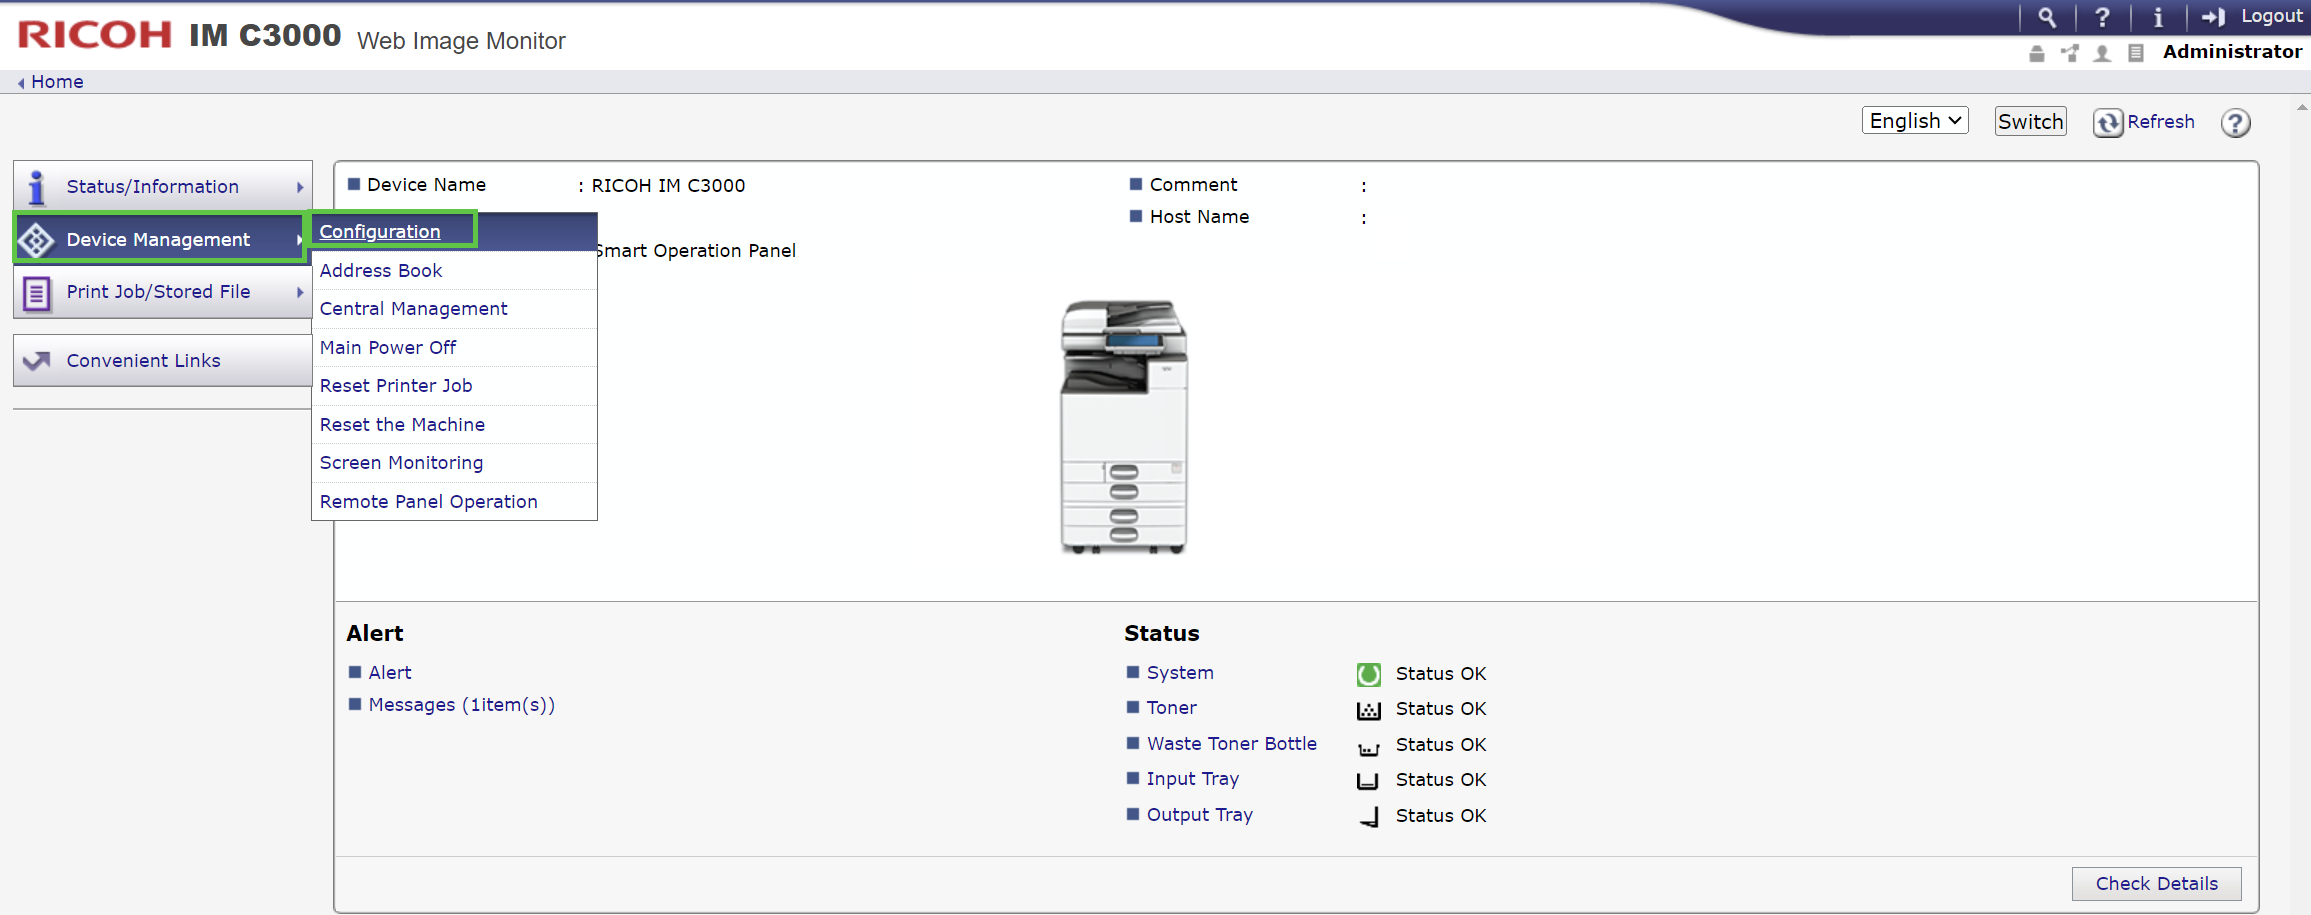
Go to Device Management > Configuration.
-
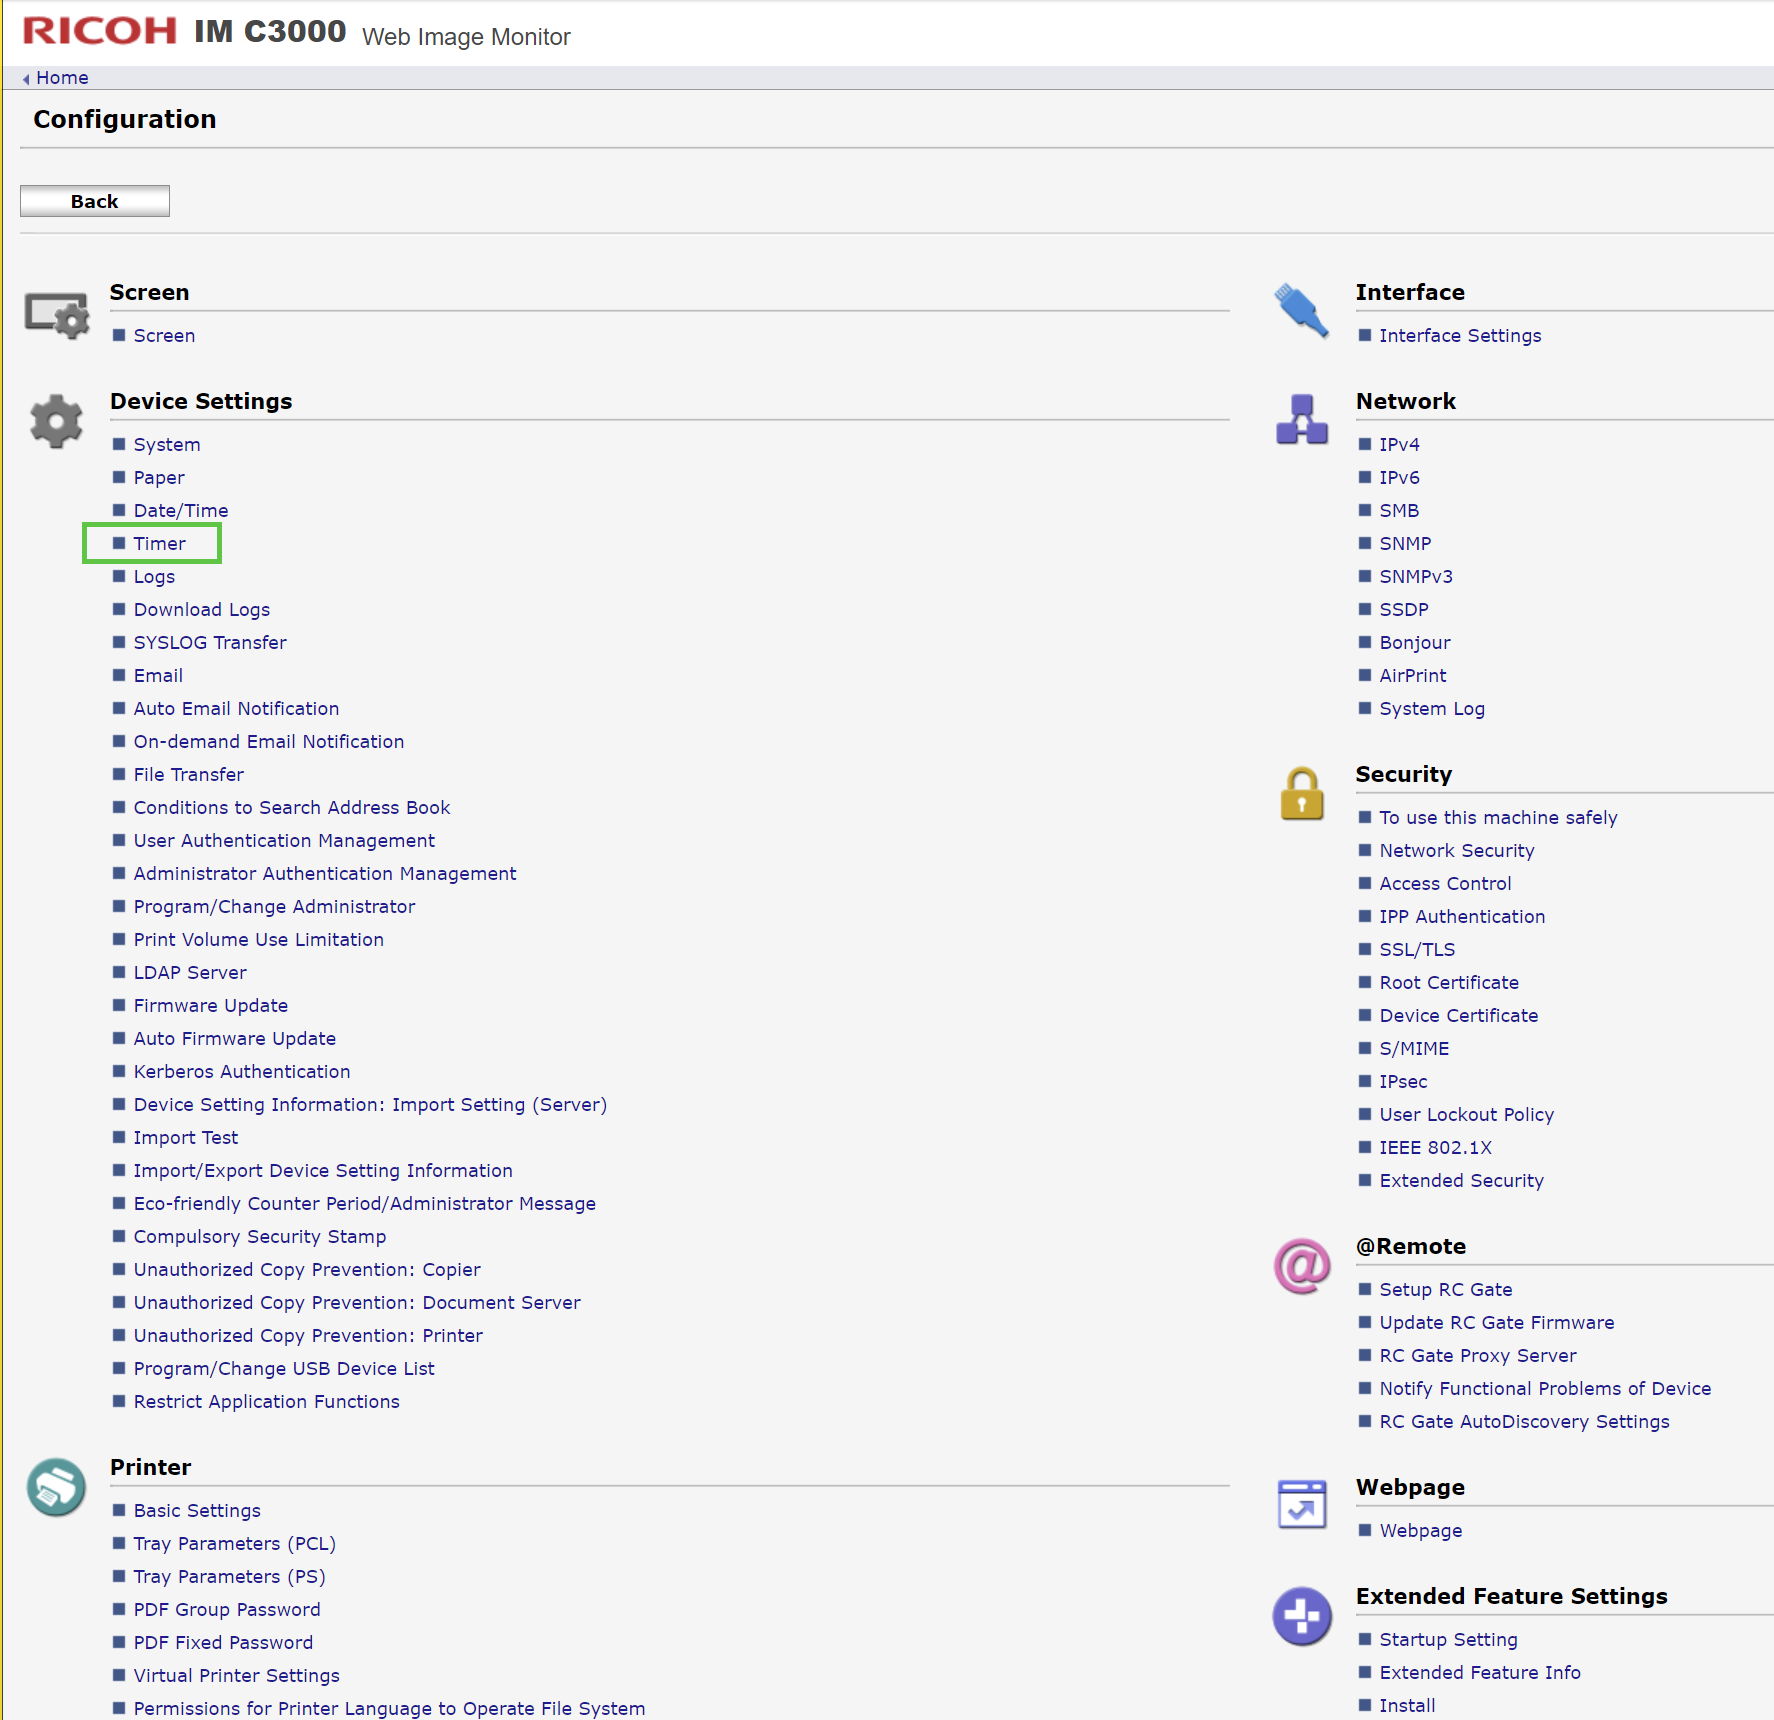
Under Device Settings, select Timer.
-
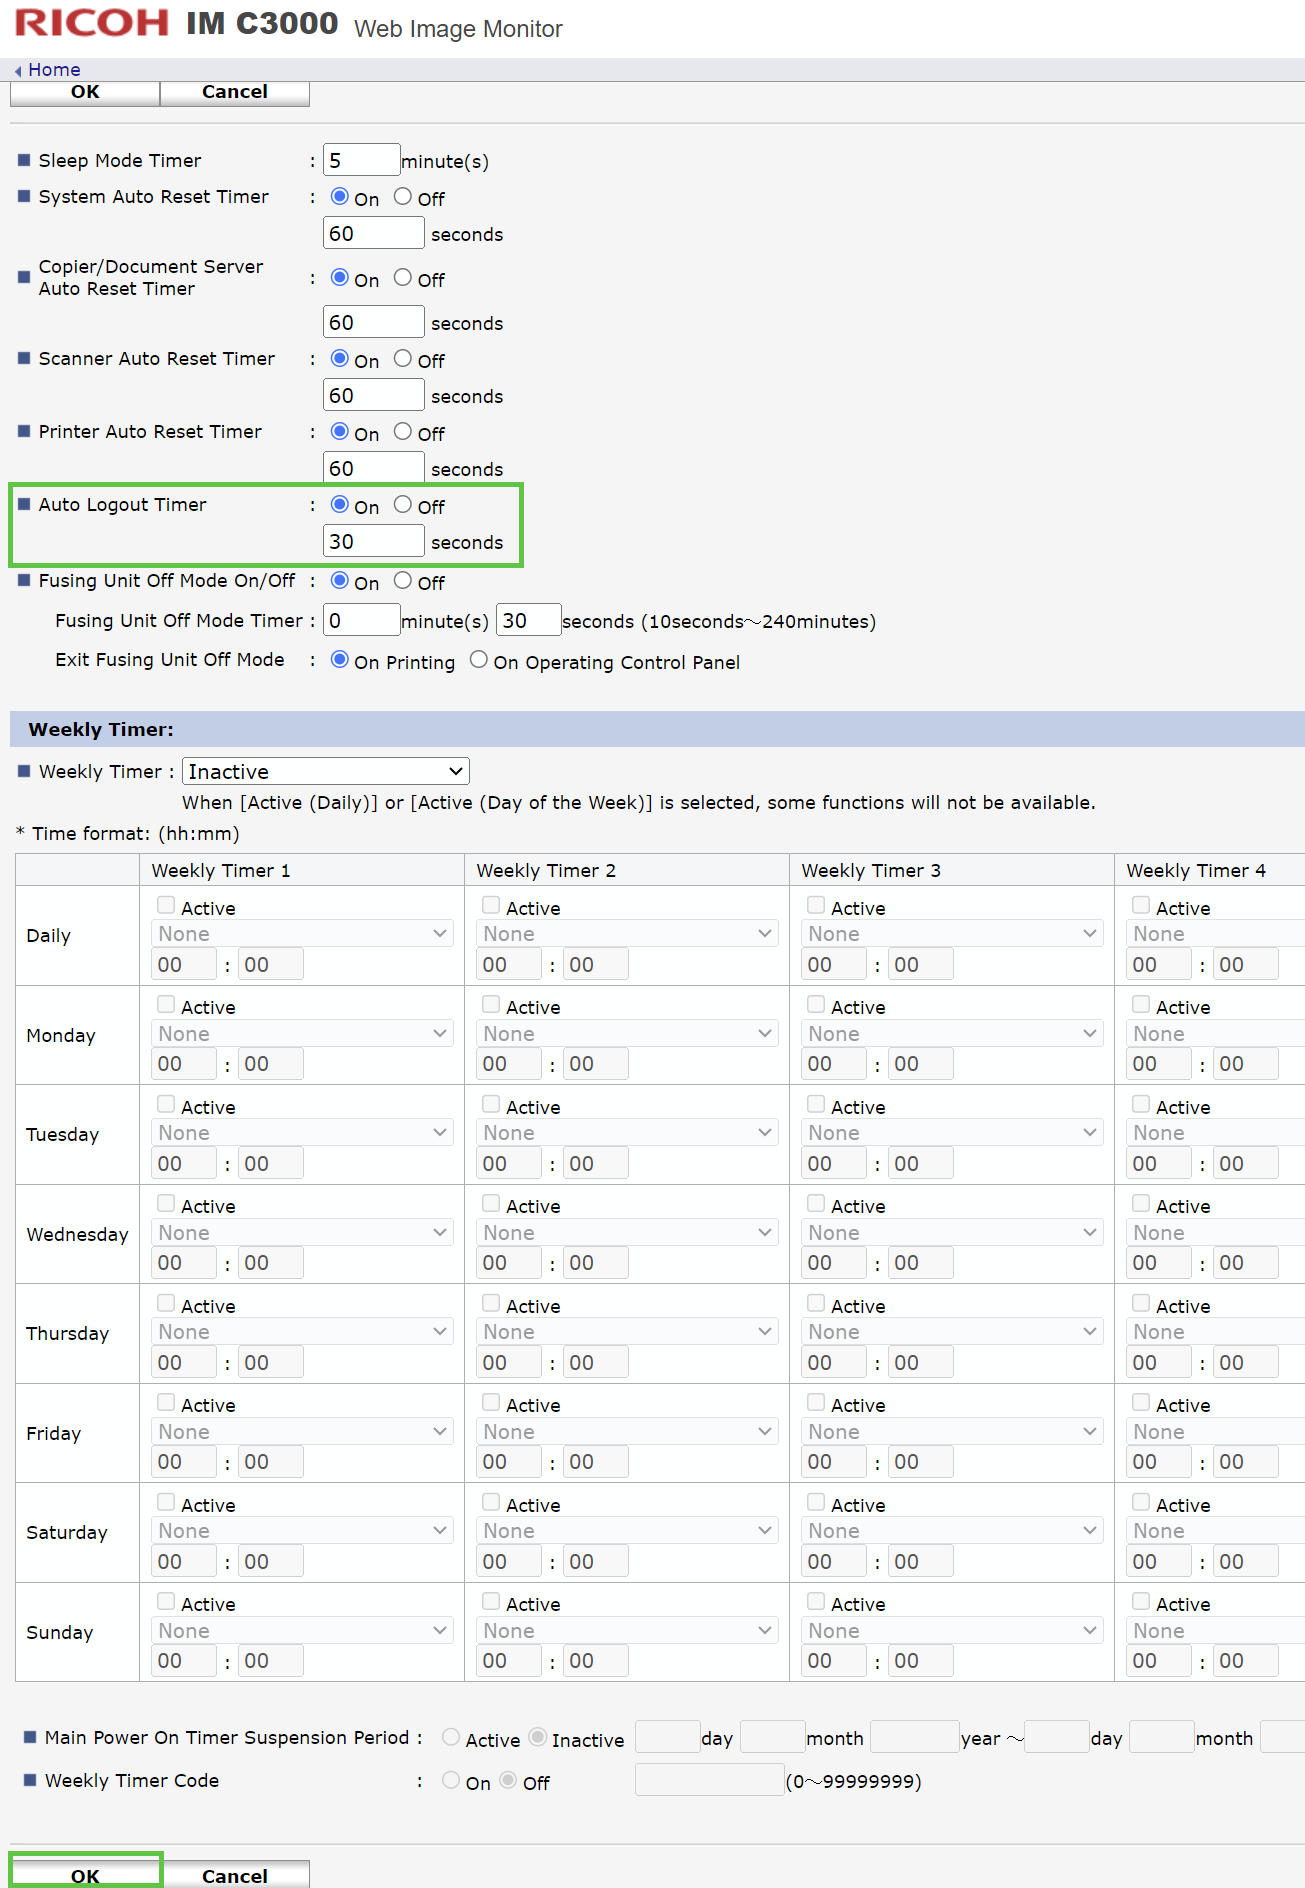
Enable the Auto Logout Timer option if it is not already enabled
-
Set the timer in seconds and click OK to save your settings.
Printing Related Settings
Printing via MyQ Roger is possible using these methods:
-
Printing from USB
The USB drive has to be connected to the device with the file for printing. It is only possible to print pdf and jpg files from USB. -
Printing from Cloud
The Cloud storage has to be connected to the account. Currently it isn’t possible to browse Cloud storages from the device panel; printed files have to be uploaded via the mobile device. It is only possible to print pdf and jpg files from Cloud storage. -
Printing from the mobile application
For printing from the mobile application at least one Cloud storage has to be connected to the account for storing the jobs. -
Printing via MyQ Roger Desktop Client
No special settings needed on the terminal side. For the MRC configuration, check the MyQ Roger Client for Win manual. -
Printing via Universal Print
No special settings needed on the terminal side. For the Universal Print configuration, check the MyQ Roger Server Administration manual, chapter 3.4 Universal Print. -
Printing via IPP/IPPS
For spooling jobs from the computer, it is possible to use printing via IPP/IPPS. Spooled jobs via IPP/IPPS are displayed in the Ready to Print action.
IPP Configuration
-
In Windows, go to Control panel > Hardware and Sound > Devices and Printers.
-
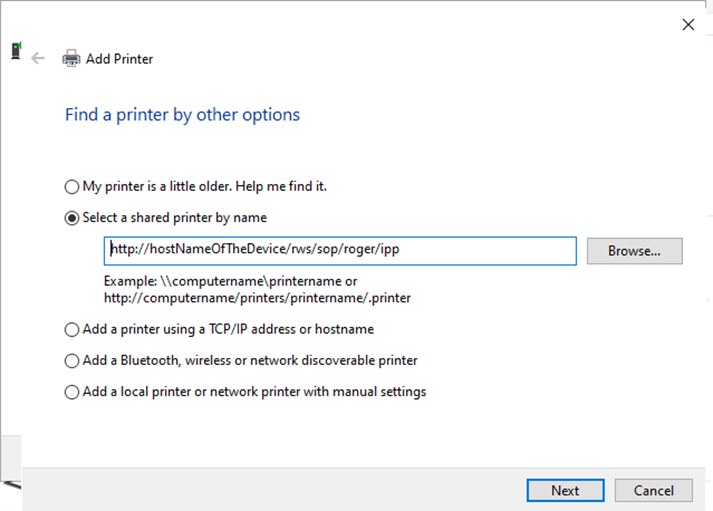
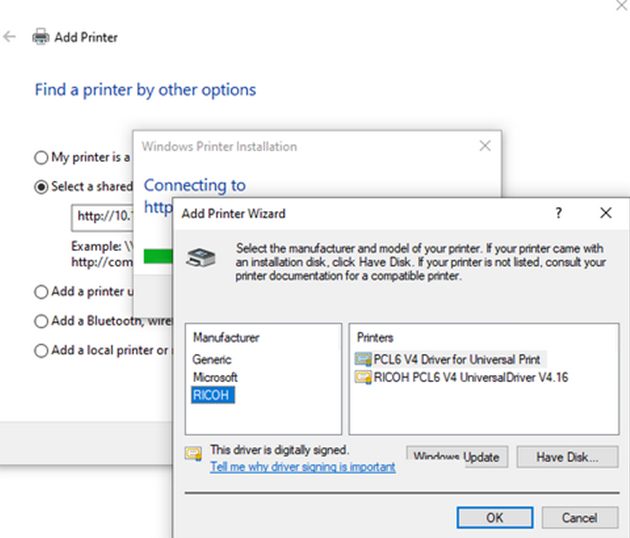
Click Add a printer, and then click The printer that I want isn’t listed.
-
Choose Select a shared printer by name and enter the URL: http://hostNameOfTheDevice/rws/sop/roger/ipp
-
Specify the printer driver
-
The printer is added and ready to use.

IPPS Configuration
-
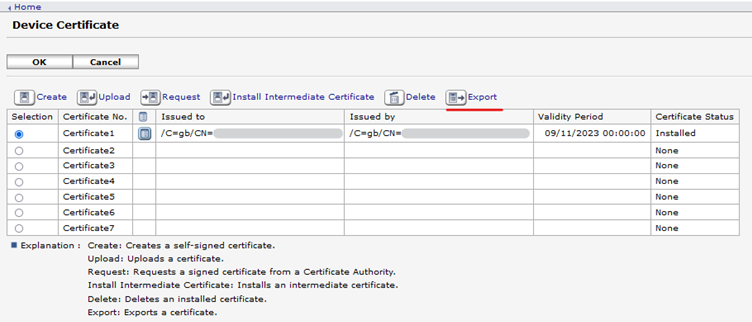
Open the device web UI and log in as Administrator.
-
Go to Device Management > Configuration > Security: Device certificate.
-
Export the certificate.
-
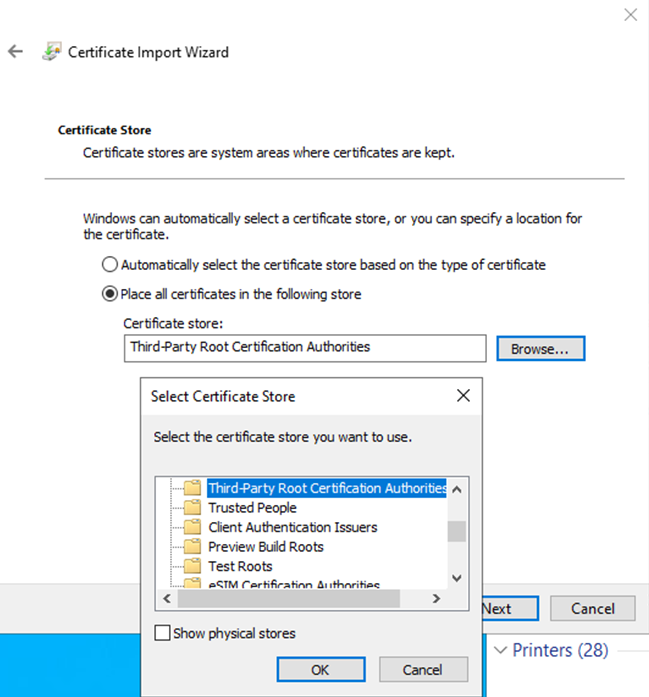
Install the downloaded certificate to Third-Party Root Certification Authorities.
-
In Windows, go to Control panel > Hardware and Sound > Devices and Printers.
-
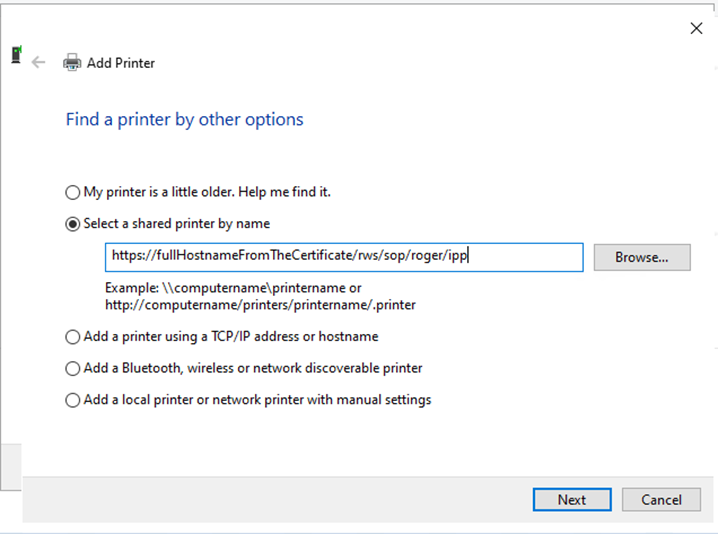
Click Add a printer, and then click The printer that I want isn’t listed.
-
Choose Select a shared printer by name and enter the URL: https://fullHostnameFromTheCertificate/rws/sop/roger/ipp
-
Specify the printer driver and click OK.
The printer is added and ready to use.
